

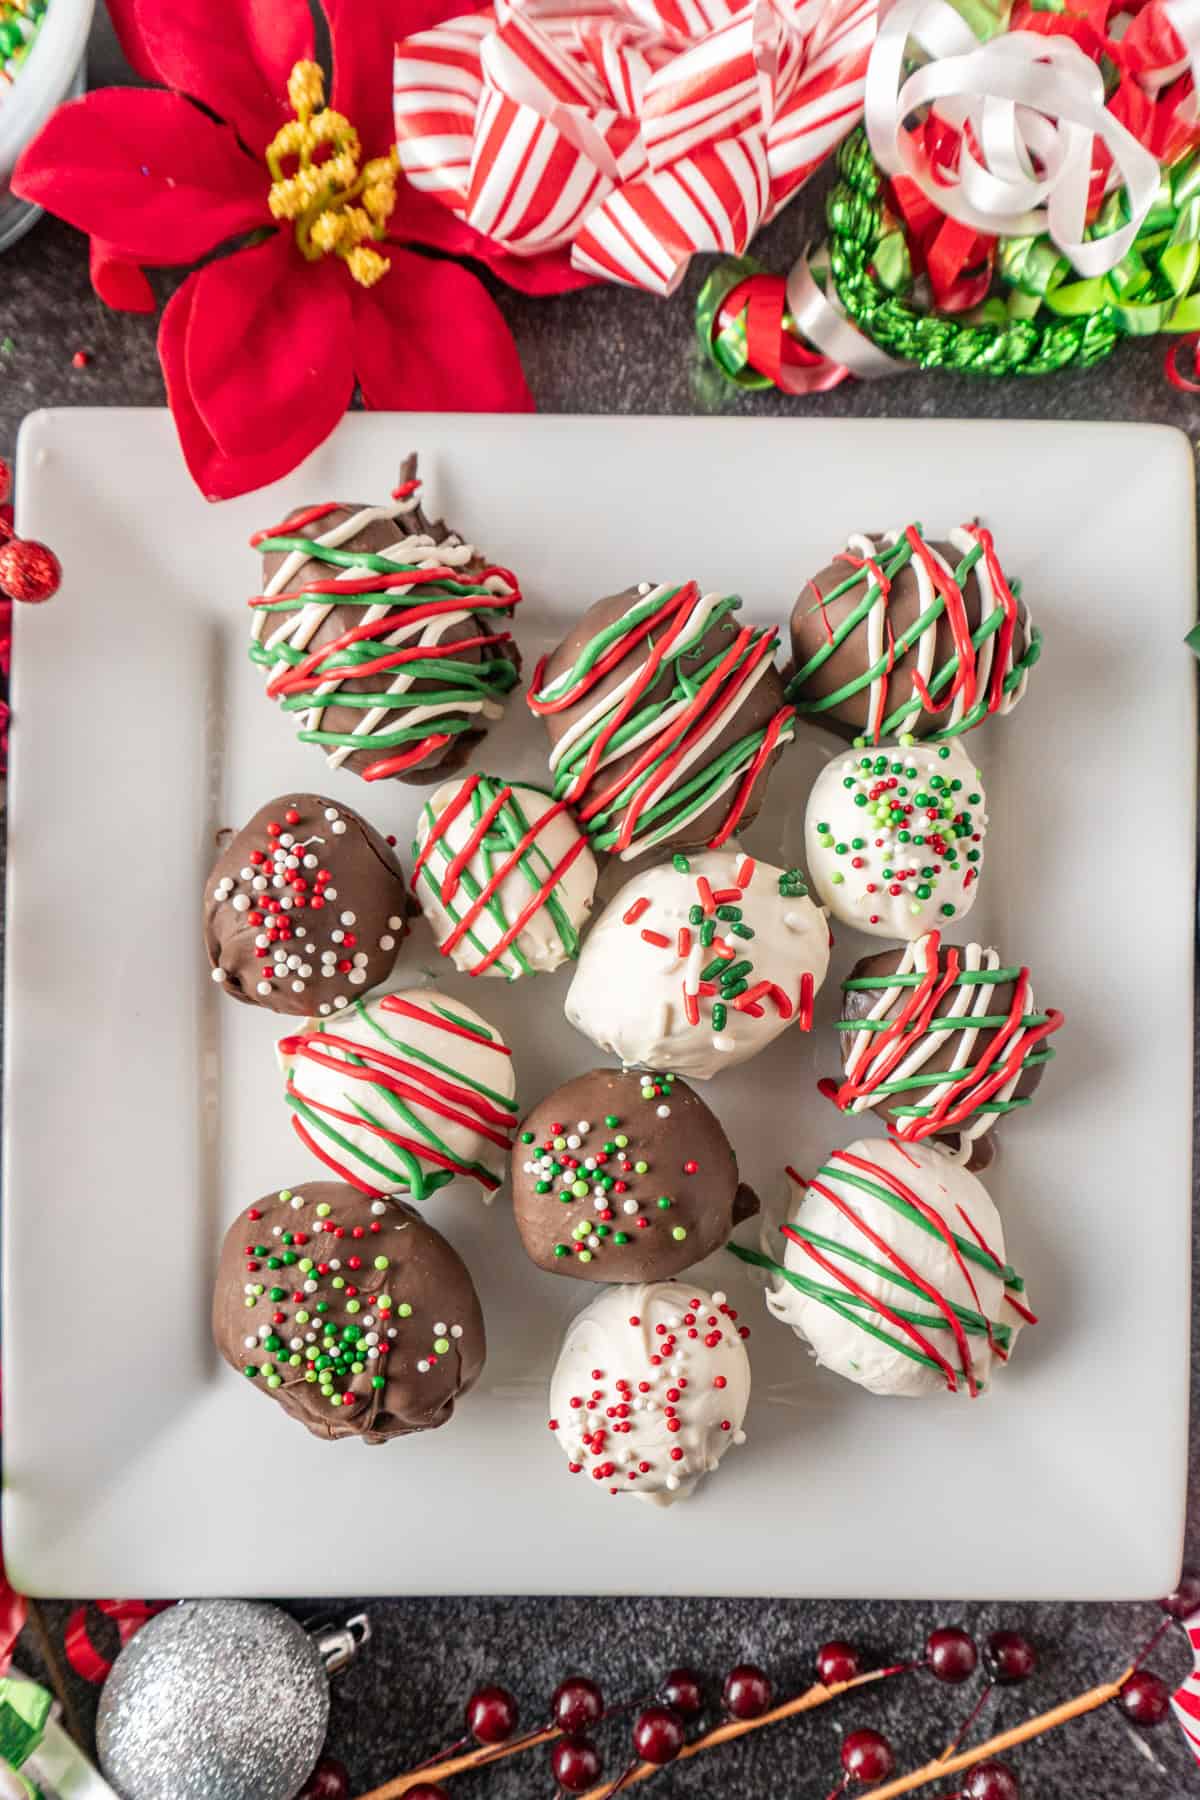
These Christmas Oreo Balls are the easiest no-bake holiday treat you'll ever make! With just a few ingredients-Oreos, cream cheese, and colorful candy melts-you can whip up a batch of rich, bite-sized truffles that look as festive as they taste.
Jump to:
Lately, I've been loving decorating all my tasty treats for Christmas! From Christmas Cake Pops, Christmas Cocoa Bombs, and Christmas Rice Crispy Treats, Easy Christmas Crack Recipe- everything is Christmas themed, and it's amazing!
I wanted to share these adorable, easy Christmas Oreo Balls before the holidays so you can make them, too!
Looking for more amazing Oreo recipes? Check out my original Oreo Truffles, Halloween Oreo Cookies, Chocolate Pudding Pie with an Oreo Crust, and these Oreo Ice Cream Bars!
Why This Recipe Works
- Simple & Quick: Only three main ingredients and no baking required!
- Festive & Fun: Holiday sprinkles and colorful candy melts make them perfect for Christmas trays.
- Rich & Creamy: The combo of crushed Oreos and cream cheese creates a fudgy, irresistible center.
- Perfect for Gifting: Package them up for easy, elegant edible gifts.
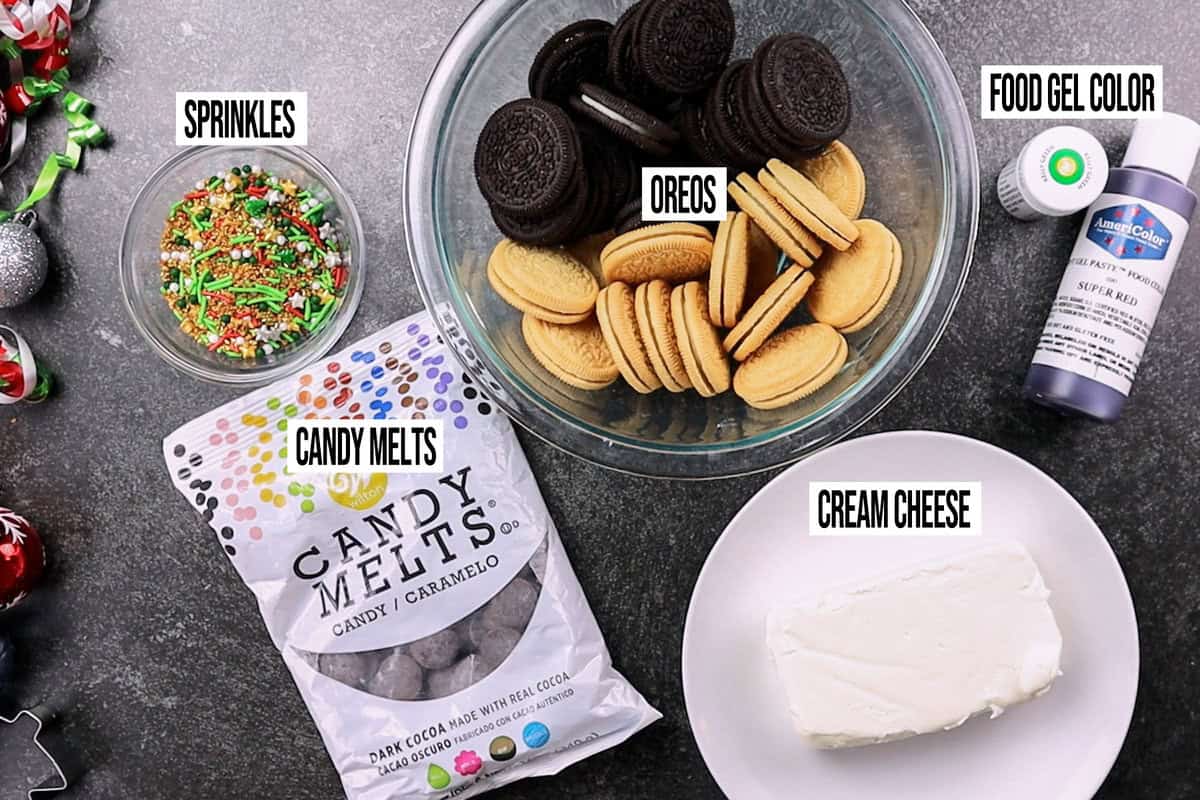
What This Recipe Needs
- Oreos- The base of these truffles - provides that tasty Oreo flavor and cookie texture. For this recipe I used Golden Oreos which can be colored easily and regular chocolate Oreos, but you can use whatever kind you prefer.
- Cream Cheese- Binds the crushed Oreos into a smooth, creamy filling. Easiest to use when at room temperature.
- Food Coloring Gel - Red and Green of course!
- Candy Melts- I used Red, Green, White, and Brown Candy Melts to stick with the Christmas theme.
- Christmas Sprinkles, Candies, and other decorating items.
How to Make Christmas Oreo Balls:

- Step 1: Using a food processor, process the golden Oreos until they are crumbled into a fine sandy texture.
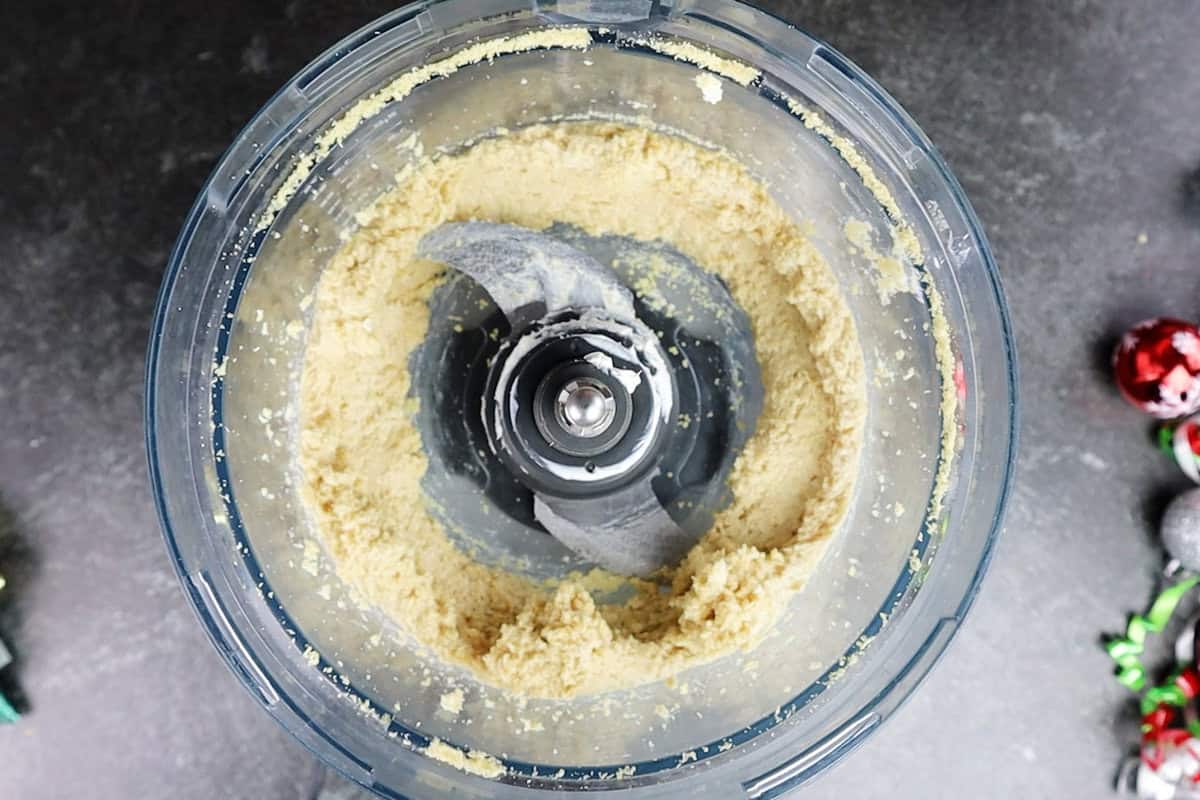
- Step 2: Add 8oz of cream cheese, and process until fully mixed.
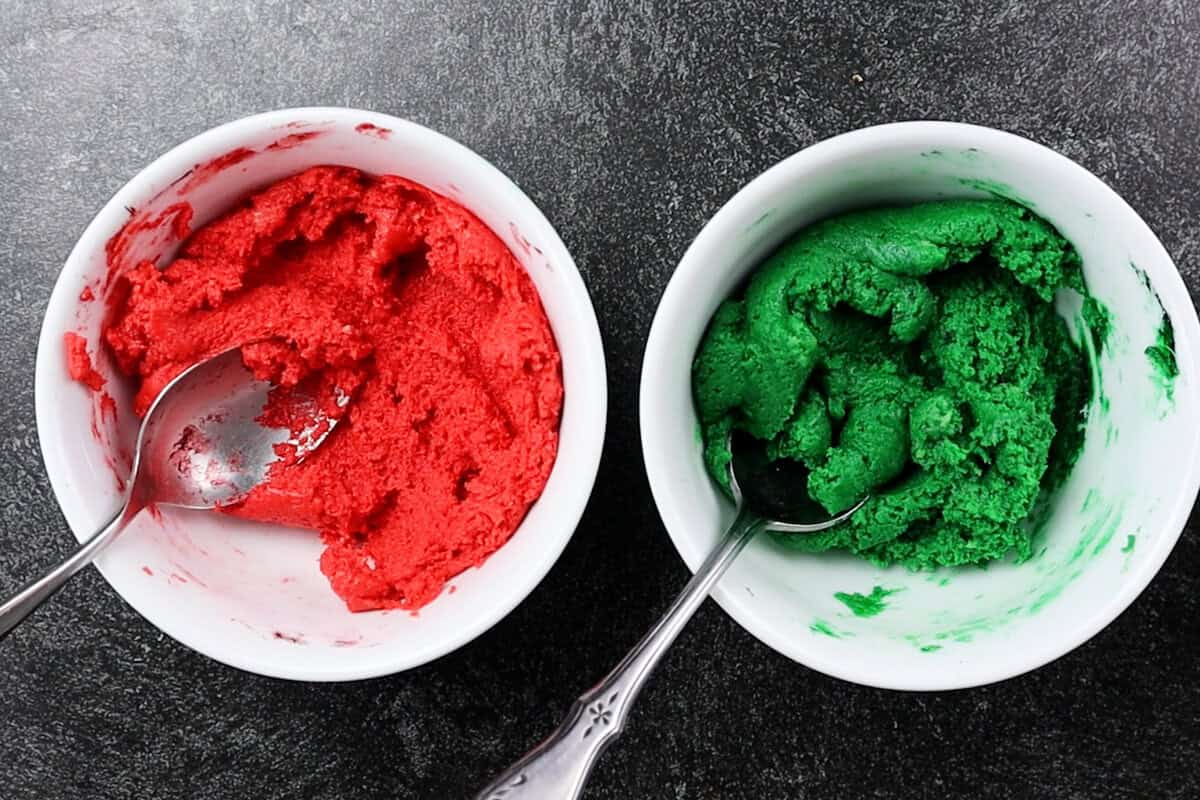
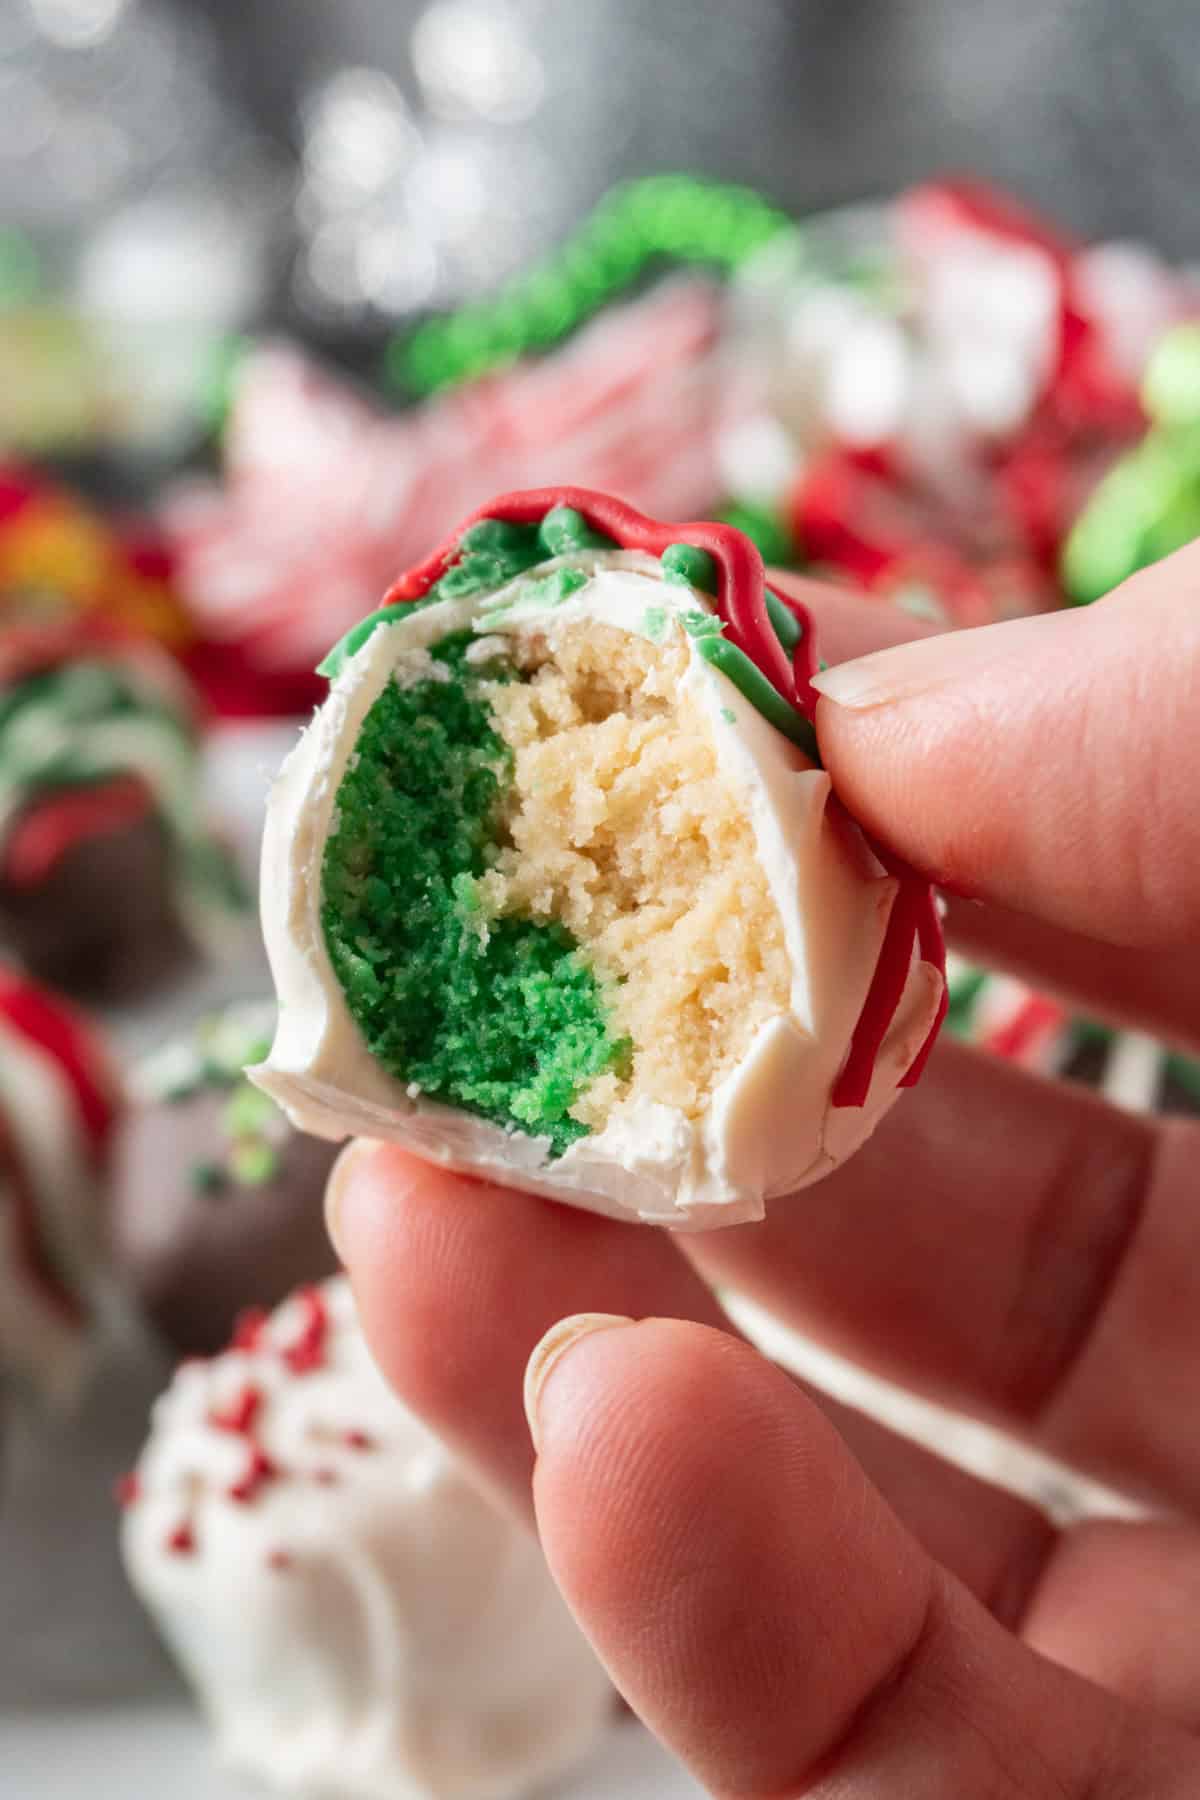
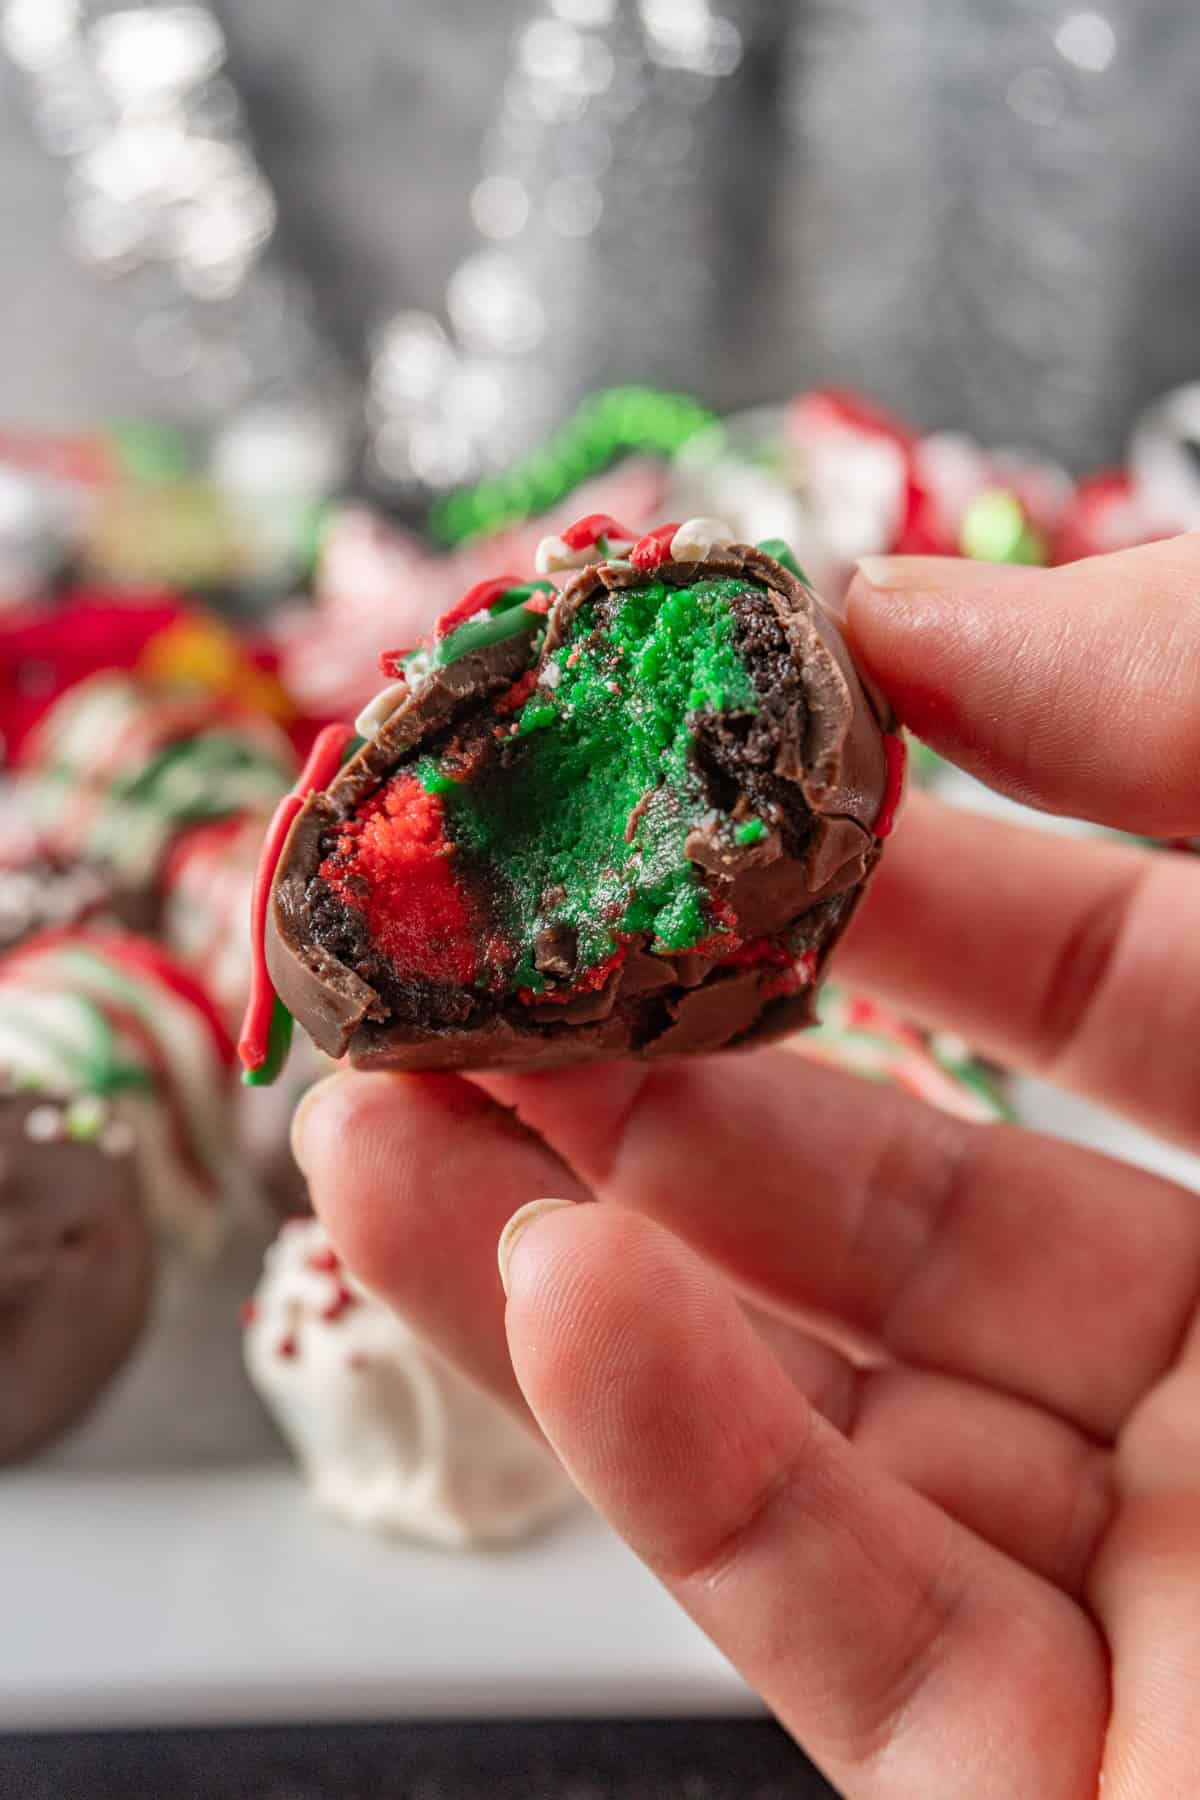
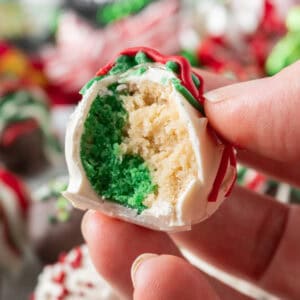
- Step 3: Remove mixture and separate into three bowls, adding red gel food coloring to one, green gel to another, and leaving the third uncolored. Mix the gel in fully, then set it aside.
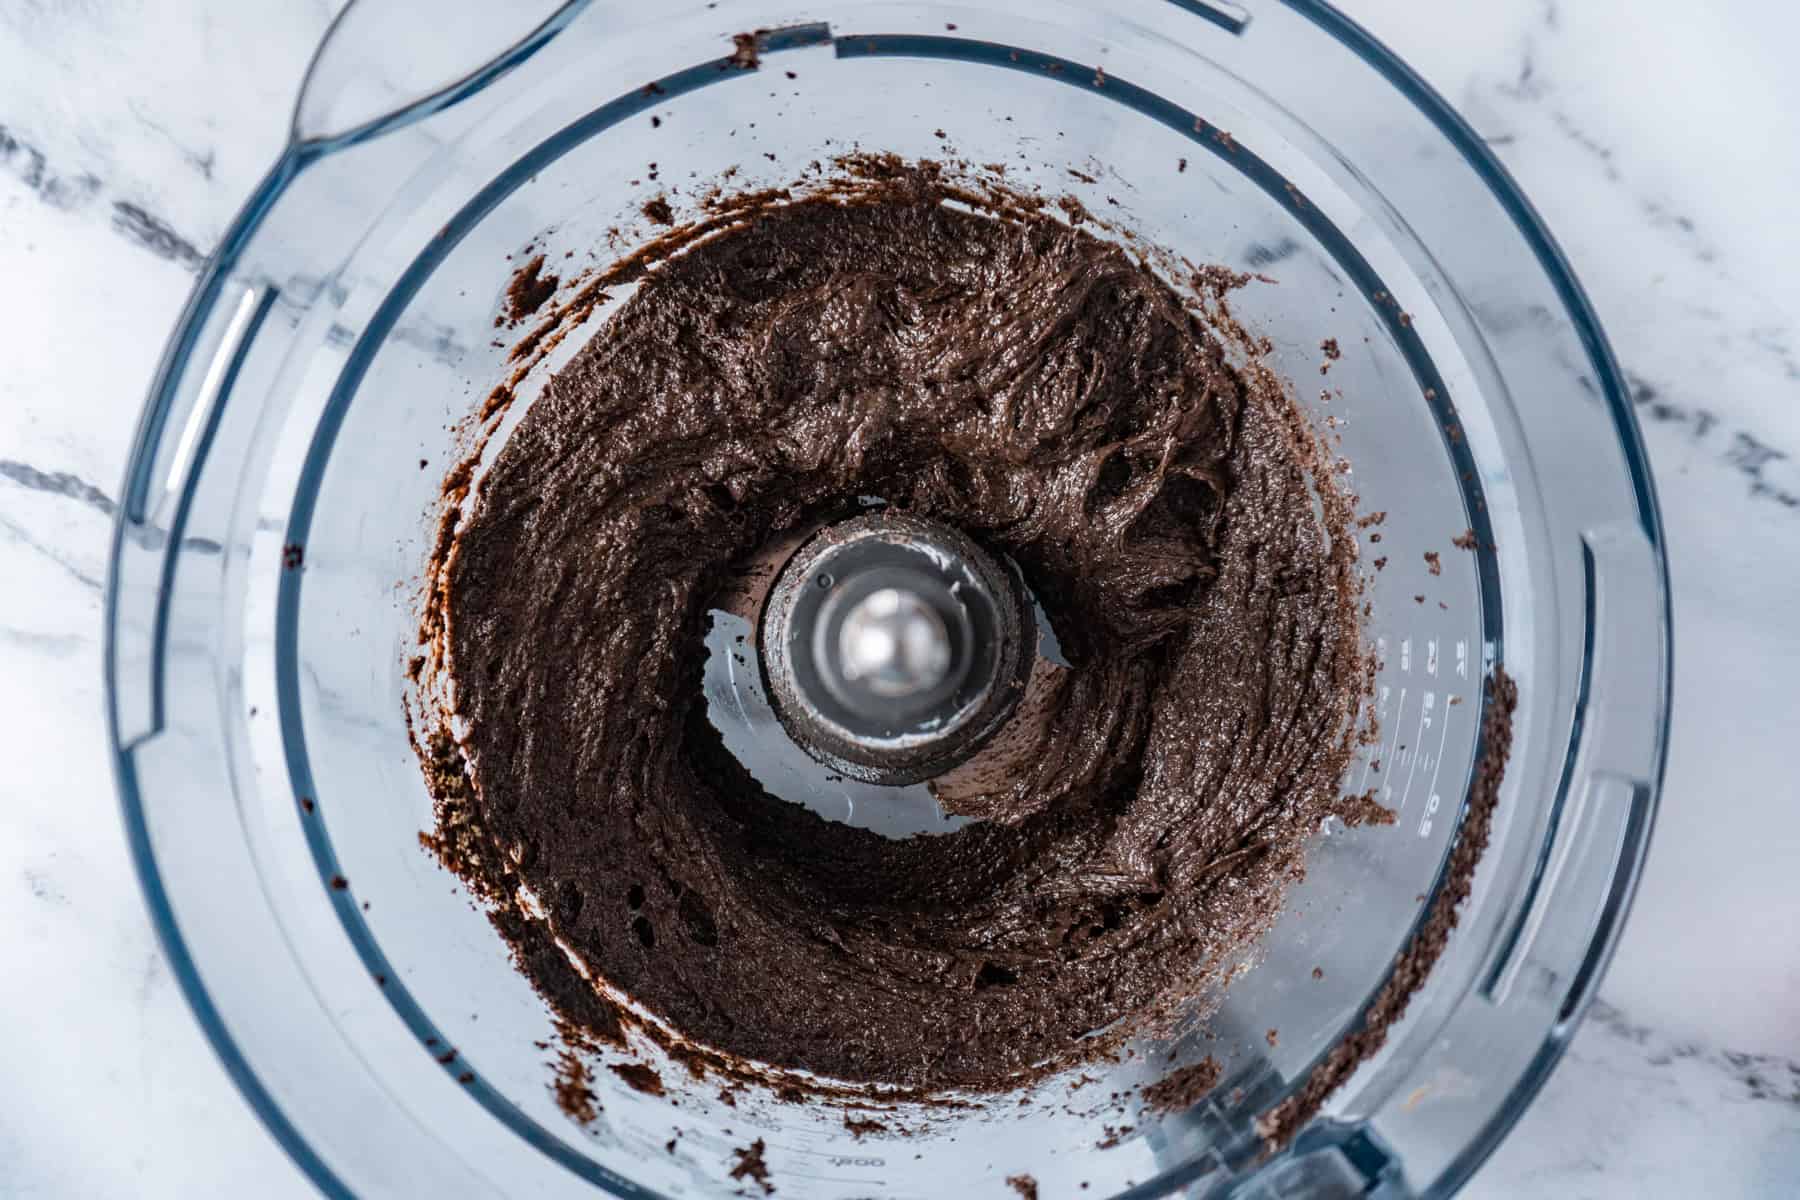
- Step 4: Add regular chocolate Oreos to the food processor, process, and then add the remaining 4oz cream cheese and mix thoroughly.

- Step 5: Scoop any combo of the Oreo filling into a ball, roll it, then place it on a parchment-lined baking sheet. Freeze Oreo balls for at least an hour.
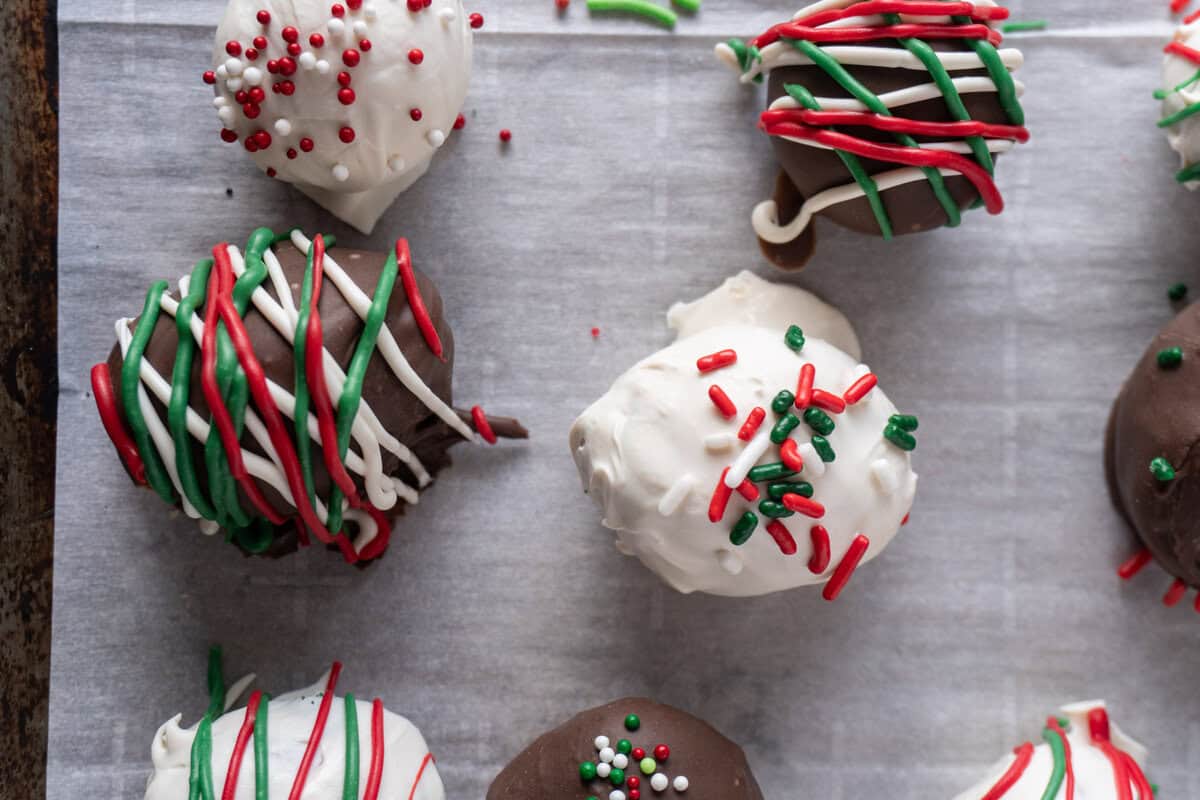
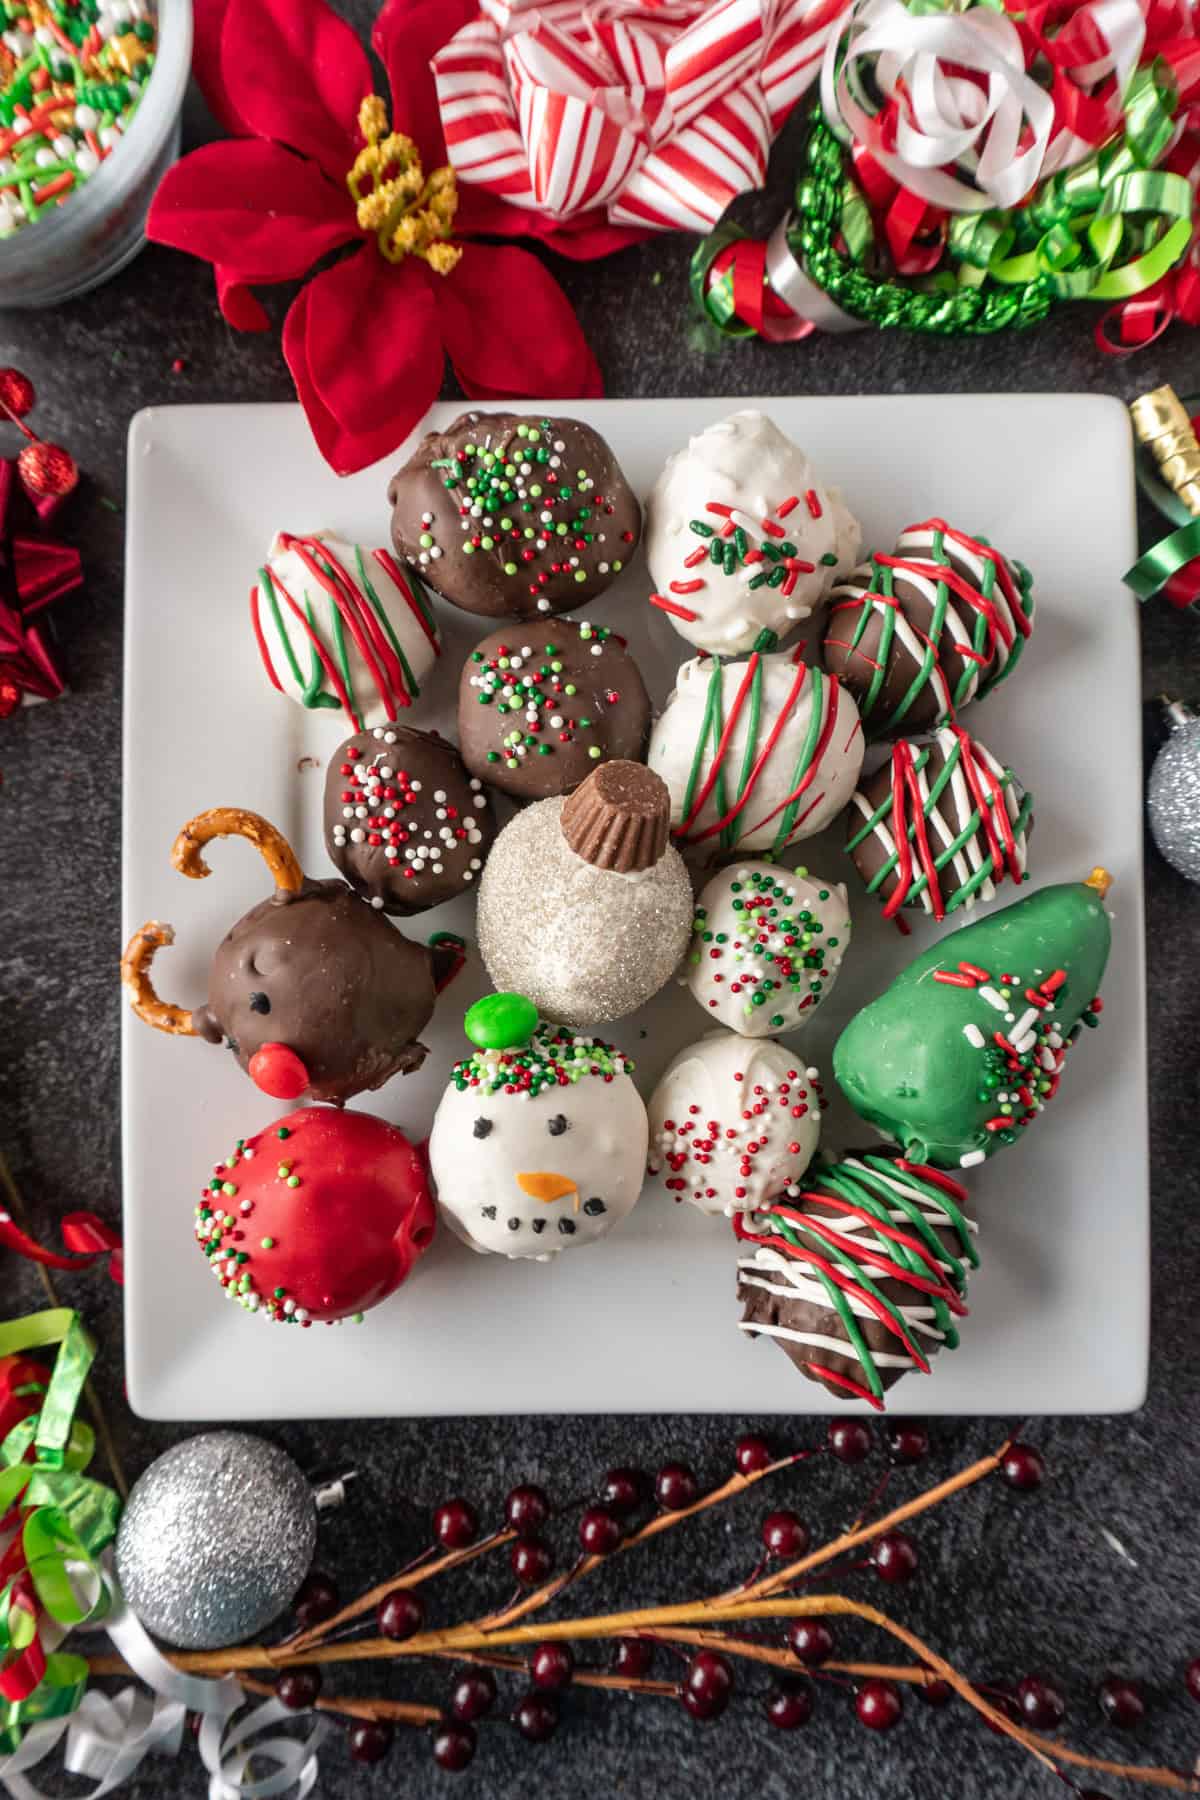
- Step 6: Melt candy melts, then, working in batches, dip Oreo balls into the candy melts to coat them thoroughly. Add sprinkles before the chocolate sets. After the initial coating sets, add strips of different colors.
Save this for later!
Don't worry, I promise not to spam you!
Decorating Tips
- Chill Before Dipping: Cold balls hold their shape better and coat more smoothly.
- Use a Fork or Dipping Tool: Helps excess chocolate drip off cleanly.
- Work in Batches: Keep uncoated balls in the fridge so they don't soften while dipping.
- Easy Decorating: For these Oreo balls, I tend to dip them and then add sprinkles right away, or dip them, let the candy harden, then add stripes of red or green candy melts on top.
- Cute Designs: You can make super cute designs like reindeer, ornaments, and snowmen, too. Just use candies, colored candy melts, and other items like pretzels to create any look you want!
- Fun Shapes: You can even shape the Oreo filling into fun tree shapes and dip them in green candy melts to make Christmas Trees!
- Storage: Keep refrigerated in an airtight container for up to a week-or freeze for longer!

Variations
- Peppermint Oreo Balls: Add crushed candy canes and Mint Oreos into the mix for extra holiday flavor.
- Snowball Style: Use white candy melt coating and dust with coconut flakes or white sanding sugar.
- Reindeer Oreo Balls: Add pretzel antlers and candy eyes for a fun, kid-friendly version.
- Drizzle Design: Drizzle red and green candy melts for a festive finish.
Chocolate Candy Melt Tips:
- Different brands and even different colors sometimes behave funny when melting. Not to mention how old the candy melts are, if the bag has been opened already etc.
- Make sure to microwave at 50% power in 30 second increments to keep the candy melts from burning. Heat, stir, heat etc. until almost all the candy is melted and smooth.
- If the candy melts are too thick add 1 teaspoon coconut oil or shortening, stir in, and repeat until you get your desired consistency.
Frequently Asked Questions
Keep any leftover Oreo balls in an airtight container or baggie in the fridge or freezer. They will last for weeks!
They last up to one week in the fridge or up to two months if frozen.
Yes! Freeze them before or after dipping-just thaw in the fridge before serving.
Add a small amount of coconut oil or shortening to the chocolate for a glossy finish.
Absolutely! They're a perfect make-ahead dessert-just store them chilled until ready to serve.
More Related Recipes
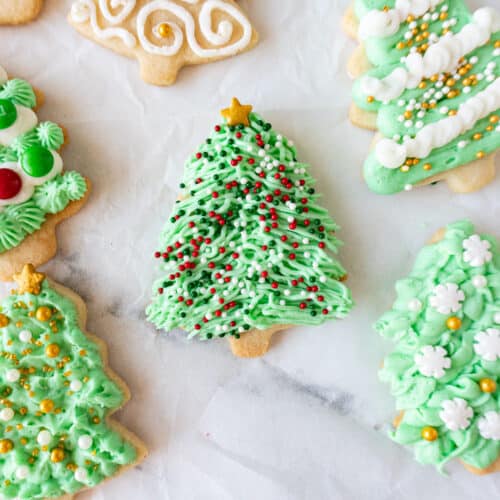
If you like this recipe, make sure to check out all my Christmas Desserts! You definitely don't want to miss this Christmas Cheesecake, Little Debbie Christmas Tree Cake Dip, Gingerbread Christmas Tree, Christmas Tree Cupcakes, Gingerbread Cookies, and this Gingerbread Bundt Cake!
If you like this recipe, make sure to give it a 5-star review and leave a comment down below!
Also, don't forget to sign up for my newsletter, and make sure to follow along on Facebook, Instagram, and Pinterest!
Christmas Oreo Balls
Ingredients
- 30 cookies Golden Oreos ~1 package
- 15 cookies Regular Oreos ~½ package
- 12 oz cream cheese at room temperature, divided
- Red and Green Food Coloring Gel
- 1 ½ cup chocolate candy melts
- 1 ½ cup white chocolate candy melts
- 1-2 tbs refined coconut oil or shortening only needed if candy melts are too thick
- Red, or Green Candy Melts for dipping or decorating
- Sprinkles, candies, or any other items for decorating
Instructions
- Prepare a baking sheet with parchment paper.
- Add Golden Oreos Oreos to a food processor and pulse until Oreos are a fine sandy texture.30 cookies Golden Oreos
- Add 8 oz of the cream cheese and pulse until fully combined. You may need to scrape down the sides a few times. *12 oz cream cheese
- Remove Oreo mixture from processor and divide into thirds. Add few drops of green food coloring to one bowl, red food coloring to another, and leave the last third plain.Red and Green Food Coloring Gel
- Add regular Oreos to clean processer and pulse until Oreos are a fine sandy texture.15 cookies Regular Oreos
- Add remining 4 oz of the cream cheese and pulse until fully combined.
- Using a tablespoon scoop, add any combination of the Oreo filling colors. Roll into a ball then place on parchment lined baking sheet. Sometime gently rolling, then tearing the ball in half and rerolling gives a nice marbled look.
- Freeze balls for 1 hour or overnight. You want them to be firm.
- Microwave candy melts according to package instructions*, adding a little coconut oil or shortening if it is too thick.1 ½ cup chocolate candy melts
- Dip Oreo balls into the candy melts and set on a parchment lined baking sheet. Work in batches of 3-5, dipping, adding sprinkles etc. Work quickly because the candy melts will set up pretty fast.
- If you are wanting to drizzle with a different color candy melt then wait until the candy melt sets then drizzle. *1 ½ cup white chocolate candy melts, 1-2 tbs refined coconut oil or shortening, Red, or Green Candy Melts for dipping or decorating, Sprinkles, candies, or any other items for decorating
Notes
- *If you don't want a marbled color look, then use a full package of Oreos, add cream cheese, then dip in the candy melts and decorate! Or use all golden Oreos with food coloring for just a red and green filling!
- *Candy Melt instructions: microwave candy melts in a microwave-safe bowl at 50% power in 30-second increments. Heat, stir, heat, etc., until almost all the candy is melted and smooth. Allow the candy melts to sit for 1 minute if there are little pieces that haven't mixed in yet. If the candy melts are too thick, add 1 teaspoon coconut oil or shortening, stir in, and repeat until you get your desired consistency.
*Leftovers: Keep any leftover Oreo truffles in an airtight container or baggie in the freezer. They will last for weeks (if you can keep from eating them for that long, that is)!


Lisa says
This recipe is so fun and tasty! Very festive fore the holidays!